
 I held my first Arduino class yesterday at All Hands Active (AHA!), a makerspace here in Ann Arbor.I had six students, including a father and his daughter, a high school student, and three other adults.
To teach the class, I used an earlier version of the Sparkfun Inventor’s Kit Guide, even though we didn’t use the Inventor’s Kit in the class. Because the Arduino kits that we did use didn’t have all of the sensors and actuators in the Sparkfun Inventors Kit, we could only do some of the experiments. The experiments that I chose included:
- Blinking an LED
- Potentiometer
- Push Buttons
- Photo Resistor
- Buzzer
I would have also liked to do an experiment with a temperature sensor and a motor or servo, but those components weren’t included in the kits that I had. On the other hand, these five experiments took up more than the two hours that I had allotted for the teaching part of the class. So, it worked out OK.
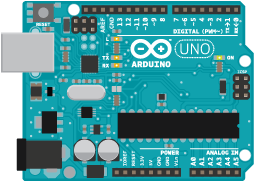
I got the starter kits—the Elegoo EL-KIT-004 UNO Project Basic Starter Kit with Tutorial and UNO R3 for Arduino—from Amazon. My thinking is that it would be inexpensive for students to purchase and had enough “stuff” to get the students started.
Unfortunately, it didn’t really have quite enough “stuff.” It was, for example, missing a potentiometer. So, to supplement the kit, I made up a couple of pots with wires that they could plug into the breadboard. It would also have been nice to have a temperature sensor and a motor or servo, so that the students got a better idea of what you could do with an Arduino.
I also wasn’t thrilled with the quality of the breadboard in the kit. One of the students had a problem getting one of the experiments to work, and as it turned out, it was because one of the wires connecting the components wasn’t making good contact with the breadboard. It just had a cheap feel to it.
I’m thinking that next time I’ll go with something like the Keywish UNO Project Starter Kit for Arduino with UNO R3 Development Board, LCD1602, Breadboard, Servo Motor, Detailed Tutorial. It costs only a few dollars more and includes pots, a servo motor, and even an LCD display. It doesn’t have a temperature sensor, though.
Keeping the students on their toes
Partly to make up for the lack of a temperature sensor and other components, I improvised. The push button experiment called for the students to connect two momentary-contact switches to two digital inputs and an LED to a digital output. To turn on the LED, you pressed and held down one of the switches. Pressing the second, while holding down the first, turned the LED off.
That functionality seemed kind of useless to me, so I challenged the students to modify the program so that pressing one of the switches would turn the LED on and remain on, even if the switch was released. To turn the LED off, you had to press the second switch.
One of the students. Laria, had a solution in minutes. It took the others a little while longer, but after I shared Laria’s solution with them, they all had their versions working soon after. It was a fun exercise and got them thinking “outside the book.”
When all was said and done, I think we all had fun and learned something about Arduinos. The students learned how to do both digital and analog output and input and got a good sense of what the Arduino can do. I also learned a thing or two about teaching Arduino classes. I plan to have another go at this in three months or so.
I wish I’d seen this before I bought my intro Arduino kit. It was cheap, but very short on any kind of sensor. I had fun writing a program to count up some number, blinking one LED if the number was prime, another if not. Hardly world-changing, but a lot more fun than “Hello, world!”
I was just reading over the weekend on how to connect a Wii nunchuck to my board. Very cool stuff.
I’d like to be in your next class, I dabbled with arduino, but hit a road block and walked away.
I was thinking of doing a weekday evening class, maybe in February. Would that work for you?