
The project below was described in an email to the Elecraft mailing list nearly ten years ago. I saved the email and just ran across it again. Way back when, the designer, Mike, AB3AP, graciously gave me permission to post this to my blog. This project is as good today as it was ten years ago. Thanks, Mike!…Dan
This is an easy afternoon project to switch multiple CW keys between several rigs. If you’ve ever wanted to change keys on one rig or use one key on several rigs, this gadget makes it easy. Plug keys into the box inputs, and plug each of the box outputs into a rig.
No need to fumble around behind the rigs to move a key from one to another or to swap paddles for a bug. No power is needed to the switch box since this project is purely mechanical. Now it’s a snap to jump into a dx pileup at 30 wpm on the paddles, followed by a leisurely straight key chat.
Materials
- 1 – rotary wwitch. I used 2 poles of an old 2 pole/6 position/2 deck rotary switch I had. A 2 pole/4 position switch would be enough for me, but I used what I had on hand.
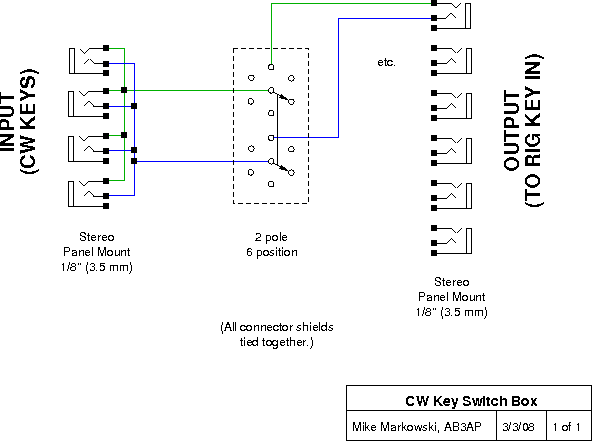
- 10 – 1/8-in. / 3.5 mm panel mount stereo jacks. My design gives you four inputs and six outputs. I use stereo connectors because my Elecraft rigs require them. Depending on your rigs, mono might be ok. The number of inputs can be any number since they’ll be wired together. The number of outputs is determined by the number of positions your rotary switch has. I don’t have 6 rigs, but now I certainly have room to grow! See the schematic below.
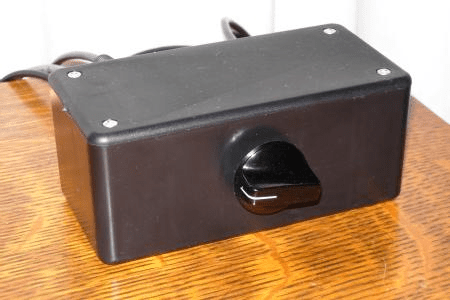
- 1 – project box. Approx. 5″ x 2.5″ x 2.5″ or larger will work.
Assembly
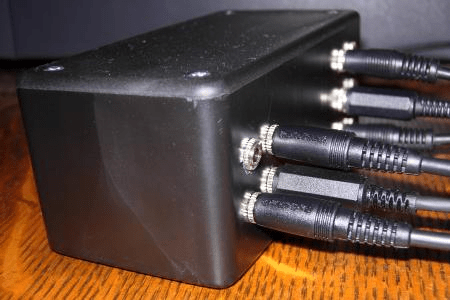
- Drill holes as desired. I put all connectors on back with just the knob of the rotary switch on front. I grouped 4 connectors together as inputs and 6 as outputs.
- Daisy chain the four input connector rings together and then tips together as shown in the schematic below.
- Connect any input tip and ring to two rotary switch inputs as shown in the schematic.
- Connect each output connector tip/ring to switch outputs. The schematic shows just one pair to reduce the clutter.
- Connect together all shield connectors.
- Mount hardware in box.
Hooking it all together
- Plug in your favorite paddles, straight key, bug, side swiper to any of the input connectors.
- Hook each output connector up to your rigs’ key connectors.
Usage
The keys are switches themselves, expensive ones, so there’s no need to use another switch to select one. That’s why they’re all wired together at the input connectors. Simply use the rotary switch to choose a rig and then tap away on whichever key you like. (Don’t forget to set your rig for keyer or hand key!)
Drawing wiring diagrams is a really useful design step. I was drawing a diagram for a mic adaptor for my KX3, needed to split the logic bias (for up/down buttons) from the mic bias (which is cleaner and the right level). I drew it all out, then realized that a garden-variety stereo splitter would do the job. So I ordered one.
An electret mic goes into the left arm of the splitter, and the right arm is available for PTT.
https://observer.wunderwood.org/2015/08/16/yamaha-cm500-headset-with-ptt-on-elecraft-kx3/
Excellent Walter! Just what I was looking for!
Also great project Dan, I think I’ll put this on my to do list!
73
k5acl
Some rigs (e.g. K3) have two inputs, one 1/4″ mono for a hand key, and one 1/4″ stereo for a paddle. Others sense whether a paddle or hand key is plugged in by checking to see if the ring circuit is shorted to ground on power up.
Don’t know how you’d like to handle these cases. The latter one would required cycling the power on the rig. Don’t know how to fix the K3 and others like it that may have two CW inputs.
Thanks for this cool project. I built it the same way you suggested and it works great with three inputs (keys/keyer) and outputs to three rigs via the switch. VERY convenient!
73, Mike W2TB
I just came across your post. this is something I’ve been meaning to build, for years. And another one, for routing audio from each of the rigs, to my headphones and PC. I thought I had all the parts together but then discovered I don’t have an enclosure! On its way. 73 – Martin, G4EFE
Now built! Works perfectly, of course. I have a key (or keyer output) and a paddle plugged in the front, switched to one of six rigs. And I added a TUNE button on the front, for those ‘ATU adjustments’ times.
73 – Martin