• Skip to primary navigation
  • Skip to main content
  • Skip to primary sidebar
  • Skip to footer

KB6NU's Ham Radio Blog

KB6NU's Ham Radio Blog
  • HOME
  • Study Guides
  • Teach a One-Day Tech Class
  • W8SRC Repeater Guide
  • Advertise
  • Hire Me

Test Equipment

Trade magazine articles: home lab equipment, antennas 101, AC grounding

April 25, 2022 By Dan KB6NU Leave a Comment

Here are some articles from the electronics trade magazines (well, online “magazines,” anyway) that I found interesting:


Equipment Recommendations for a Home Electronics Lab

Some of the author’s suggestions may seem a bit pricey for a radio amateur’s home lab, but good test equipment will yield good results. He writes:

With one exception, I like test equipment with knobs. That refers to scopes, signal sources, and power supplies. Siglent makes a nice, economical line of these kinds of instruments and they’re all available tomorrow via Amazon. You will probably need multiple power supplies, and you’ll want an old-school linear supply for audio work. Once upon a time, I’d have said buy only HP T&M gear (because I worked there, so I have a preference), and older HP gear from eBay can be nice, but the Siglent stuff comes with a warranty.”


Welcome to Antennas 101

In a very short space, the author does a pretty good job of explaining antennas and some of their parameters. For example, here’s how he explains antenna efficiency:

Antenna efficiency is like efficiency in general—the ratio of power out to power in. However, it’s designated in several different ways. In most cases, efficiencies account for the I2R losses, losses in any dielectric, and losses based on coupling to other devices. What may not be included is any loss related to antenna and transmission- line mismatch losses, resulting in reflected power and a higher SWR.

However, some measures of efficiency factor in any change in antenna radiation resistance variation. Most small antennas aren’t that efficient. Anything better than 50% to 60% is usually good, but always seek to improve it if you can.


AC grounding: essential, dangerous or both?

The first thing that the author of this piece does is to explain that, “A large part of the confusion comes from the ambiguous and this sloppy terminology associated with that innocent-sounding seven-letter word.” He then explains that the word ground can refer to any one of three types of circuit connections:

  • Earth ground where the circuit is actually connected to Earth, which acts as an infinite source and sink for electrons;
  • Common (may also be called signal ground), which establishes a 0-V point in a circuit (and there is often more than one of these in the circuit). It’s usually very misleading to even use the word ground with this one.
  • Chassis ground, which connects all nominally zero-volt potential points in a circuit; it may be connected to Earth ground, but often cannot be as there is no Earth ground for many devices such as most portable, battery-operated ones; here, it may be misleading to use the word ground if it is not connected to a real Earth ground.

The rest of the article is equally enlightening.

Filed Under: Antennas, Electronics Theory, Test Equipment Tagged With: grounding

Amateur radio videos: S-parameters, crystals go to war, why Fluke meters cost so much

December 22, 2021 By Dan KB6NU Leave a Comment

An intro to S-parameters

With the advent of the nanoVNA, S- parameter measurement is now within reach of most hams. What are S-parameters? Watch this video and find out. Most hams probably don’t need to know this stuff, but it’s pretty cool when you do know it.

Crystals go to war

They don’t make films like this anymore. I’m guessing that they don’t make crystals like this anymore, either.

Why are Fluke meters so expensive?

Fluke meters are arguably the Cadillacs of the test and measurement world. In this video, Dave explains why this is so. Although he gives eight reasons why Flukes cost more than other meters, I think that the most important is measurement confidence. You just feel more confident about the measurement when you’re using a Fluke.

Filed Under: crystals, Electronics Theory, Test Equipment Tagged With: Fluke, s parameters

Amateur radio videos: SuitSat lives?, Flex S-meter readings, why is a second as long as it is

February 26, 2021 By Dan KB6NU 1 Comment

I like going to the movies and seeing short films. Here’s a good one involving SuitSat, of all things…

DECOMMISSIONED | Sci-Fi Horror Short Film from Perception Pictures on Vimeo.


This video is probably only of interest to Flex owners, but it certainly answered a question of mine as to why the noise level on my Flex is usually around S3/S4.


A video from NIST on how we came to use atomic clocks for measuring time.

Filed Under: Test Equipment, Videos Tagged With: atomic clocks, FlexRadio, NIST, S meter, SuitSat

From my Twitter feed: RPi Pico, scope probes, reducing noise in the shack

January 26, 2021 By Dan KB6NU Leave a Comment

digikey's avatar
Digi-Key Electronics  @digikey

@Raspberry_Pi launches their new #PicoBoard featuring their own #silicon. What that means and more >>> dky.bz/3c1KC2P


eevblog's avatar
Dave Jones @eevblog

NEW EEVblog Video! EEVblog #1367 – 5 Types of Oscilloscope Passive Probes COMPARED youtu.be/rzo4Ntxqu1E


mw0ian's avatar
Ian @mw0ian

Replying to @K5PO @_M0JJF and 4 others

Have you guys seen GM3SEK noise video, well worth a watch youtu.be/LSL1h6MJbaI

Filed Under: EMI/RFI, Microcontrollers, Test Equipment Tagged With: oscilloscopes, RaspberryPi

Interesting stuff I found in my inbox

December 30, 2020 By Dan KB6NU Leave a Comment

I’m on a lot of ham radio mailing lists, and people are constantly sending me interesting things to read and to watch. Here are some of the coolest from the past couple of weeks…..Dan

Smallest transceiver ever?

This is very cool. Adam, K6ARK, has designed a surface-mount version of the Pixie transceiver. (There are many different designs, but to get an idea of what a Pixie is, here’s a circuit description of a more recent design.) What’s really amazing about this video is the number of contacts that Adam makes with this little radio out in the boonies. I mean we’re talking less than a watt output and a receiver that’s as wide as a barn door. Very impressive.

Beginner’s Guide to the NanoVNA

The Absolute Beginner’s Guide to the NanoVNA by Martin Svaco, 9A2JK is a wonderful introduction to this cool, little instrument. It not only includes instructions on how to use a NanoVNA, there is a short history of the instrument and the different version out there as well as a brief theory of operation. If you have a NanoVNA, you should get this guide.

Easy ISS SSTV Reception

I know that this is a little late for this series of ISS SSTV transmissions, but I’m sure that they’ll do it again sooner or later.

Filed Under: Gear/Gadgets, QRP, Test Equipment Tagged With: ISS, nanoVNA, Pixie

Interesting stuff from the trade magazines: Make your own conductive inkHeathkit, scope fundamentals

December 17, 2020 By Dan KB6NU 1 Comment


How to Brew Your Own Conductive Ink

An engineer gets creative and mixes up a batch of conductive ink to make his son a birthday present.

…read more


Heathkit: An Employee’s Look Back

Heath Company was the largest kit company in the world. Heath designed and put practically every type of electronic product into kit form. Its products, called Heathkits, were exceptionally popular and many are still in use today. Recently, electronic design talked with Chas Gilmore, who was a Heath executive. For those of you who fondly remember Heathkit and miss its products, here’s a look back at this amazing company and the lessons it offers.

…read more


Oscilloscope Fundamentals Poster

Learn how to check the attenuation of your probes, how to check probe compensation, how to connect the probe ground and how to connect the probe tip to the signal you want to measure. Also learn how to avoid pitfalls such as not seeing a signal, aliasing and how to use the built-in help button when all else fails.

…get the poster

Filed Under: Building/Homebrew, Kits, Test Equipment Tagged With: conductive ink, Heathikit, oscilloscopes

More videos: NanoVNA, SK – then what?, retro ESD

December 16, 2020 By Dan KB6NU 1 Comment

Introduction & Tutorial to the NanoVNA

In this talk given to the Fair Lawn (NJ) Amateur Radio Club, Alan, W2AEW, tell you everything you need to know to get started with the NanoVNA.

Silent Key – then what happens?

Randy, K7AGE, gives us some advice on how to make it easier for those we leave behind deal with the equipment we leave behind.

ESD with Dan Anderson

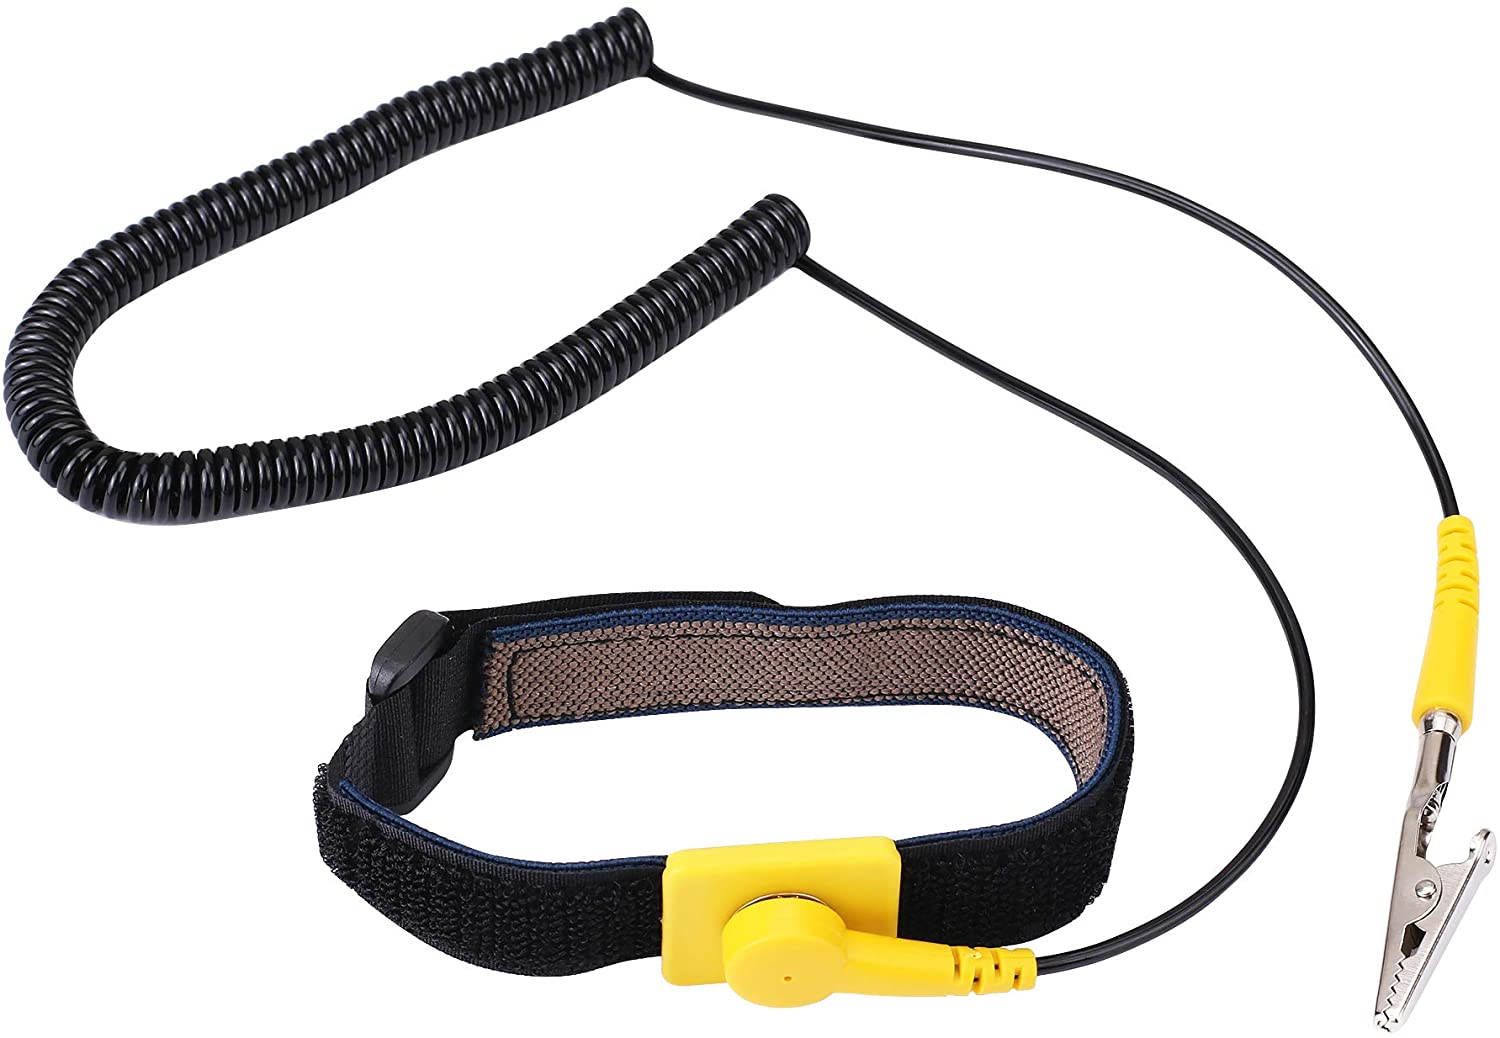
This is a blast from the past. Dan Anderson was one of the first to preach the benefits of controlling electrostatic discharge (ESD) in electronics manufacturing facilities. As you’ll see in this video, he was a real huckster, too. I ran across Dan Anderson when I was a technical editor for Test&Measurement World magazine. He had a little kit that he would give the editors that consisted of a wrist strap, a transistor radio, and some kind of probe that could detest electrostatic charges. I still have the radio and wrist strap and use the wrist strap whenever I’m puttering around with circuits.

Filed Under: Building/Homebrew, Test Equipment, Videos Tagged With: ESD, nanoVNA

Keysight: How to prevent ESD damage

November 29, 2020 By Dan KB6NU 2 Comments

Here are some tips from Keysight on how to prevent ESD from damaging your electronics:

  • USE A GROUNDED WRIST STRAP whenever you are handling equipment or boards. Using a grounded wrist strap prevents your body from building up charge and causing damage when this built-up charge discharges into your equipment or test boards. Make sure to connect that alligator clip to ground!
  • USE GROUNDED WORK SURFACES OR MATS for your boards. Do NOT use static generating or insulating materials as a work surface. Non-grounded mats and static generating/insulated materials can inductively charge boards, especially exposed ones. When connecting a charged board to equipment, the board can cause damage by discharging into the equipment’s inputs.
  • KEEP CHARGED MATERIALS AT LEAST 0.3 METERS FROM EXPOSED ASSEMBLIES. This includes plastics, foam, or other materials that can build up charge. Having a charged material near an exposed assembly can inductively charge the assembly. The assembly can then discharge into the equipment’s inputs.
  • DISCHARGE YOUR CABLES BEFORE CONNECTING THEM TO YOUR EQUIPMENT. Cable discharge process:
    • Ensure your device is off.
    • Connect your cable to your device.
    • Attach a 50 Ω shunt to the open end of the cable.
    • Remove the shunt and immediately attach your device to your equipment. This prevents the center conductor of your cable from discharging stored charge into your equipment. A charged assembly can charge connected cables.
  • USE BOARD STANDOFFS AS NEEDED. In some situations, you need board standoffs to provide extra insulation for your exposed assemblies. This prevents your grounded mats from making unwanted connections on your board.
  • NEVER USE “PINK” PACKING MATERIAL FOR BOARD TRANSPORT OR AS A WORK SURFACE. While many people think pink packing material is ESD safe, in most cases it easily builds up unwanted charge. Unless continuous, thorough testing is done, treat pink packing materials as charged.
  • CAP UNUSED EQUIPMENT INPUTS to avoid accidental ESD and physical damage. Damage often occurs by accidentally contacting equipment inputs. Capping unused inputs protects them from incidental ESD damage.
  • USE ESD-SAFE BAGS WHEN TRANSPORTING BOARDS. This protects boards from ESD damage while moving between ESD-safe locations.
  • DO NOT OVERDRIVE EQUIPMENT INPUTS. Start your testing at the least sensitive input setting and zoom in on your signal. Additionally, observe the maximum input levels for your specific equipment. The least sensitive setting is the most resilient, so starting there ensures that your inputs are at safe operating levels

I like to think that I follow ESD-safe procedures, but there are a couple of things here that I hadn’t thought about before. For example, I’d never really thought about discharging test equipment cables before connecting them. I think that’s a good tip

To learn more, go to https://www.keysight.com/find/PreventESD

Filed Under: Building/Homebrew, Test Equipment Tagged With: ESD

If my radio has an SWR meter, why do I need an antenna analyzer?

September 23, 2020 By Dan KB6NU 6 Comments

On the Amateur/Ham Radio subreddit, a poster asks:

I’m new to HF and reading my FT-450D manual while waiting for the supplies to build a dipole, and I have a question. If some HF radios show the SWR while transmitting, what is the purpose of using a separate antenna analyzer? I’m assuming that the analyzer provides more information or shows the SWR of multiple bands. Is that correct? Thanks!

As usual on this subreddit, he’s gotten some very good answers:

An antenna analyzer lets you tweak the design of your antenna right at the antenna itself without connecting it to the radio and gives you instant feedback if you need to lengthen or shorten the elements, the tuning stub, etc. It is a much faster/easier process (if you are into building antennas) than using your rig to do so. And yes, it gives you more info – such as impedance….


The SWR bridge in most rigs are not terribly accurate but good enough. In Icom radios at least the circuit the SWR is derived from is actually the fold-back circuit that reduces output when the SWR gets high to protect the power transistors.

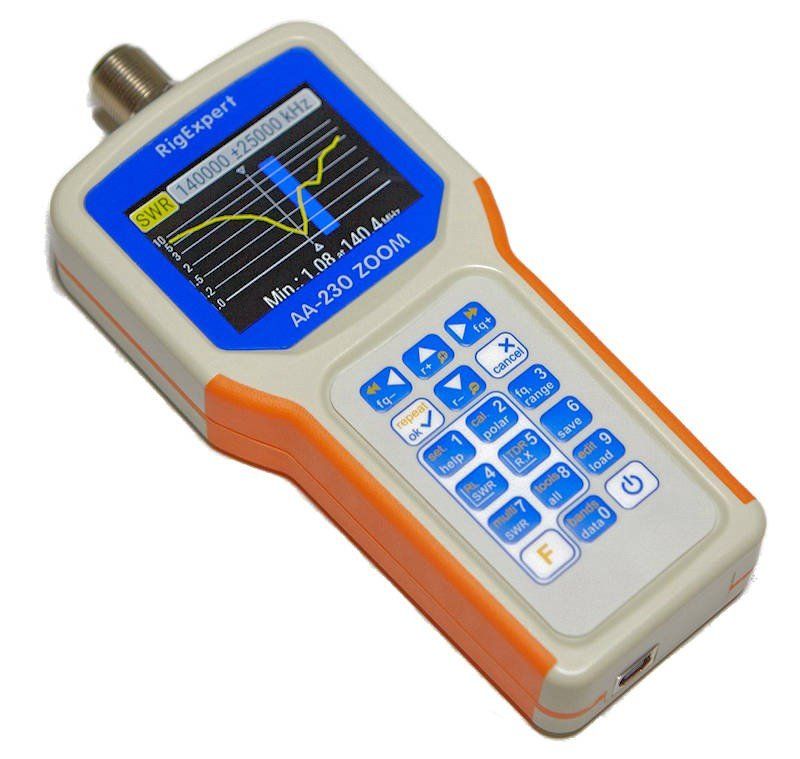
An analyzer does more than just SWR, it will tell you the resistive and reactive components at a minimum. The better ones have graphing functions, can sweep frequency ranges, do smith charts, measure 1/4 and 1/2 wave stubs, coax velocity factor, interface with software running on a PC so you can save and review etc. The RigExpert analyzers do all that stuff.. Invaluable if you like experimenting with antennas.


Some antenna analyzers can draw a nice graph of SWR versus frequency, so without the hassle of taking a lot of readings you can say “hmm, the swaaar is low just below the amateur band, lets try making this antenna slightly shorter”

Here’s an example of a fancy SWR vs. frequency display that some antenna analyzers are capable of.

One aspect of this is that some antenna analyzers can measure complex impedance.

A SWR of 2:0, in a 50 ohm system, could mean the antenna impedance is 25+j0 or 100+j0 or 50+j36 or any number of other impedances.

If you know the antenna impedance at a particular frequency then you can calculate component values for a matching circuit.

My take on this issue is that antenna analyzers provide much more functionality than the SWR bridges built into transceivers. Sure, you can tune an antenna by making SWR reading on your transceiver, but it’s going to take you a lot longer than it would with an antenna analyzer. Even if your analyzer doesn’t have a fancy display, you can easily change the operating frequency, note the SWR reading, and determine if an antenna is too long or too short. And, you don’t have to run up and down stairs to make a measurement on your transceiver.

I don’t know about the accuracy. It would be interesting to compare the reading from an antenna analyzer with the reading from a built-in SWR meter. My guess is that the antenna analyzer would be a little more accurate. After all, the purpose of the built-in SWR bridge is to protect the rig’s final transistors, and that being the case, the designers might be a little more conservative about the readings.

I always advise students in my Tech classes to consider purchasing an antenna analyzer, especially if they’re going to be playing around with antennas. Not only is it a very practical thing to have, it’s an educational tool as well. You learn a lot about antennas by tinkering with them and noting the changes in measurements.

Filed Under: Gear/Gadgets, Test Equipment Tagged With: antenna analyzers

Amateur radio videos: nanoVNA edition

September 20, 2020 By Dan KB6NU Leave a Comment

Here are a couple of videos on how to use the NanoVNA. The first is from Alan, W2AEW, who does such a great job with his videos. One cool thing to note is that it looks like Alan is using a guitar pick tethered to his NanoVNA to make changing settings easier to do. I also like the way he’s using the NanoVNA to show how an antenna tuner affects the impedance at the end of a feedline.

This video compares the NanoVNA to an antenna analyzer, in this case the MFJ 259B. You can see that the two instruments give very similar results. The question is which one is the more accurate?  

And finally, here’s an app note from Tektroniix, “Introduction to VNA Basics.” It explains a little bit about how a VNA works, the types of measurement that you make with a VNA, and how they are unique compared to other RF test equipment. It also discusses S-parameters and why you have to calibrate a VNA, and how to do it.

Filed Under: Test Equipment Tagged With: nanoVNA

  • « Go to Previous Page
  • Page 1
  • Page 2
  • Page 3
  • Page 4
  • Interim pages omitted …
  • Page 15
  • Go to Next Page »

Primary Sidebar

No Nonsense Technician Class License Study Guide (for tests given between July 2026 and June 2030)

New No Nonsense Technican Class Study Guide now available!

The 2026 version of my Tech Class study guide is now available, and as always, the PDF version is FREE!. The ePub version costs $11.97, and a Kindle version and paperback version will be available on Amazon shortly.

Click here to get all of my "No Nonsense" study guides.

Also available: The CW Geek's Guide to Having Fun with Morse Code

W5SWL.Com
Retevis Ailunce H1 DMR Radio
DXpander: Cobweb antennas, Laser Cutting

You’ve got mail!

Enter your email address below and get an email every time I publish a new post.

Email


I frequently teach classes to help newcomers get their licenses. The next class will take place on Saturday, February 7, 2026 on the University of Michigan campus. Click here for more information.

If you can't make the class, subscribe to the mailing list to be notified of when the next class will be held.

You can always download my free study guide, and if you have any questions about the classes, or amateur radio in general, please feel free to email me directly.

Support KB6NU.Com

Donate $7.30 and get two of these cool stickers. Measuring 4.25-in. W by 2.75-in. H, it's perfect for your car, your shack, or wherever!

Contact me

If you have a question or comment about one of my blog posts, or a question about any of the material in my study guides, or just a question about ham radio in general, you can email me at [email protected].

Blogs You Should Also Read

  • AE5X: A CW-centric blog from Kingswood, Texas
  • K0LWC Blog
  • LA3ZA Ham Radio Blog
  • Little Radios, Big Fun – WB3GCK
  • Mr. Vacuum Tube's Blog
  • Radio Artisan – K3NG
  • The K0NR Weblog
  • VE3WDM's QRP Ham Radio Blog
  • W2LJ’s Blog

Ham Radio Websites

  • Dashtoons – The Hammin' Comedy by Jeff K1NSS

Podcasts

  • ICQ Podcast
  • Linux in the Ham Schack
  • No Nonsense Amateur Radio Podcast
  • Resonant Frequency Amateur Radio Podcast

Recent Comments

  • Michael Burkhardt on One lump or two (or three)?
  • Eric on POTA notes, 7/27/26
  • Steve KB3JC on How to “ragchew” on CW
  • Dan KB6NU on Yaesu FT-710: What’s the big deal?
  • Andrei on Yaesu FT-710: What’s the big deal?

Meta

  • Log in
  • Entries feed
  • Comments feed
  • WordPress.org

Footer

Copyright © 2026 Daniel M. Romanchik, KB6NU · Log in