• Skip to primary navigation
  • Skip to main content
  • Skip to primary sidebar
  • Skip to footer

KB6NU's Ham Radio Blog

KB6NU's Ham Radio Blog
  • HOME
  • Study Guides
  • Teach a One-Day Tech Class
  • W8SRC Repeater Guide
  • Advertise
  • Hire Me

Circuit Design

100, 50, and 25 Years Ago in QST

December 19, 2023 By Dan KB6NU 1 Comment

Here are some interesting articles from QST in December 1923, 1973, and 1998.
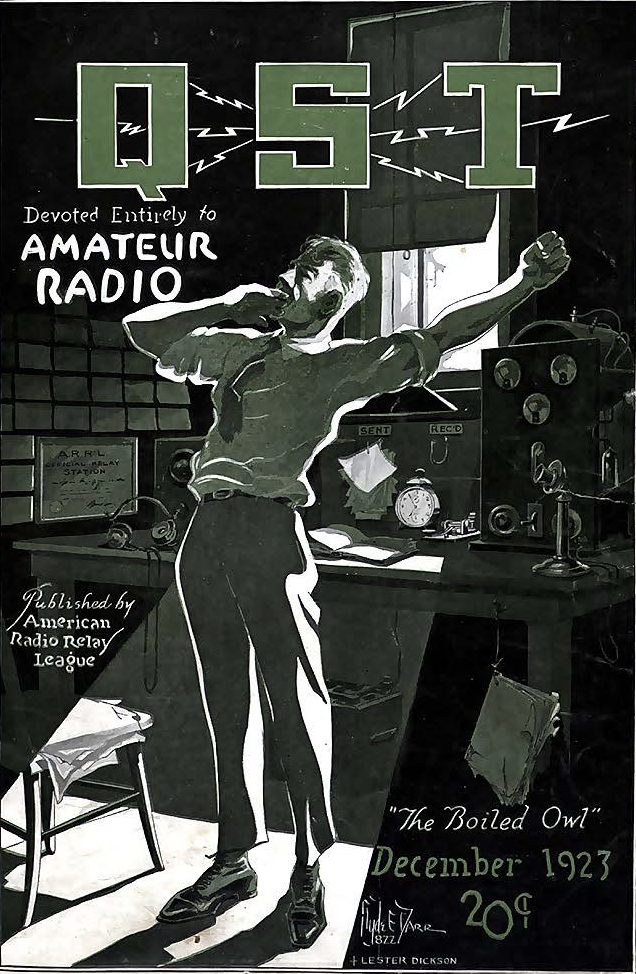
December 1923 QST

Shortwave Tuner Design by K.E. Hassel, 9ZN

Most, if not all new designs, are now software-defined, digital radios, but if you ever decide to build your own receiver, this might be a good article to consult. 9ZN gives a lot of good advice on how to make good coils and variable capacitors. This article caught my eye because of the call 9ZN because Bill Crane, W9ZN, a fellow who was a great CW operator, recently became an SK.

A High-Performance 20-, 40-, and 80-Meter Vertical System by J. Sevick, W2FMI

Jerry Sevick, W2FMI, wrote many articles and books about short vertical antennas. Here, he describes his design for a three-band antenna system consisting of one vertical for 80 meters and one for 20 meters/40 meters. He notes that they could be built separately. This article is worthwhile reading if you’re considering how to work more DX, especially on 80 meters.

Low Power, Crummy Antenna by Rob Henderson, KB7PWJ

Rob writes, “Ingenuity compensated for a limited budget in the Golden Age of Radio, and it’ll do the same today. The tools and techniques to make radio magic are everywhere. If your wallet is a bit thin, it’s time to indulge your creativity. According to Rob’s QRZ.Com page, he’s still using crummy antennas 25 years later.
Filed Under: Antennas, Building/Homebrew, Circuit Design, QRP, Receivers Tagged With: 9ZN, KB7PWJ, W2FMI

Learning about batteries

May 6, 2019 By Dan KB6NU 2 Comments

I often say that getting an amateur radio license is as much getting a license to learn as it is getting a license to operate on the amateur radio bands. Lately, I’ve been learning about batteries, LiPo batteries to be exact.

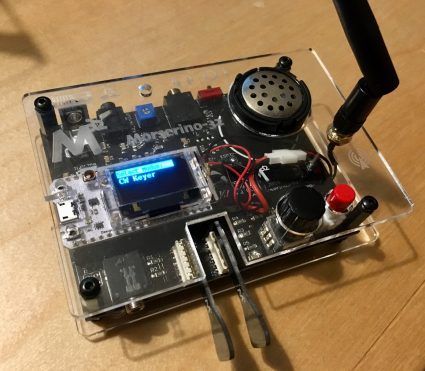
It all started when I purchased a Morserino. The Morserino is a feature-packed Morse Code learning aid. In addition to helping you learn the characters, it’s also supposed to help you learn how to copy in your head. It has a built-in touch keyer function, and a LoRa interface that lets you send and receive code from other Morserino units.

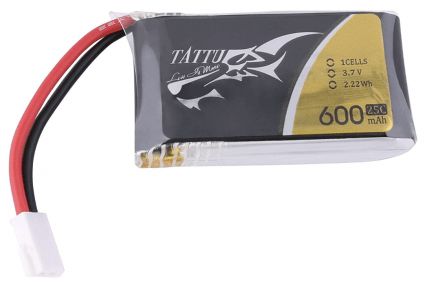
I’ll be writing more about the Morserino in a future blog post, but let’s get back to batteries. The kit did not come with a battery. Instead, it was suggested that one purchase a 600 mAh LiPo battery commonly used for powering drones. I found this battery on Amazon, and purchased a six pack of them, thinking that I’d find uses for the other five in some project or another.

Well, sooner than expected, I did find another application for one of the batteries. I’m building a little Arduino project for a client, and I reckon that this, or one with more capacity, will make a great power source for the project.

Now, I have two immediate challenges:

  1. Figure out how to charge the battery.
  2. Figure out how to connect it to the Arduino.

On the Morserino, the battery plugs directly into a connector on the bottom of the computer board (the white board with the LED display).  I knew that connecting the 5V line from the USB connector directly to the battery was a no-no, but I’d lent out the Morserino to a friend, and I didn’t have the schematics for the board. So,  how they managed to charge the battery from the USB port was a bit of a mystery.

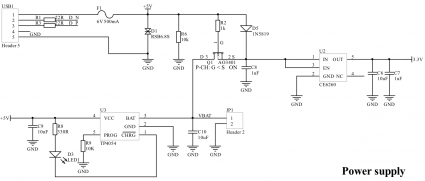
I emailed Willi, OE1WKL, the designer of the Morserino, and he sent me a wealth of information. There actually is a battery-management IC, the TP4054, on the board:

He also gave me the part number for the battery’s mating connector. He said, “The mating connector for the Molex connector on the battery is a Molex 51006. It is sometimes referred to by vendors as 51005 female, but 51005 is the connector on the battery.” You can, of course,buy pre-made cable assemblies on Amazon.

You can also buy lithium battery charging modules. These modules have a TP4056 on them, which is similar to the TP4054. It’s amazing to me that you can purchase ten of these things for less than seven bucks.

So, that’s where I’m at right now. Once I get the modules and cables, I’m going to hook it all up and get the Arduino system running from the battery. The next step will be to integrate a small solar panel and run the whole thing from solar power, hopefully.

Filed Under: Batteries, Circuit Design

The flip-flop turns 100 this week

May 31, 2018 By Dan KB6NU 1 Comment

I got this from the slowspeedwire Yahoo group:

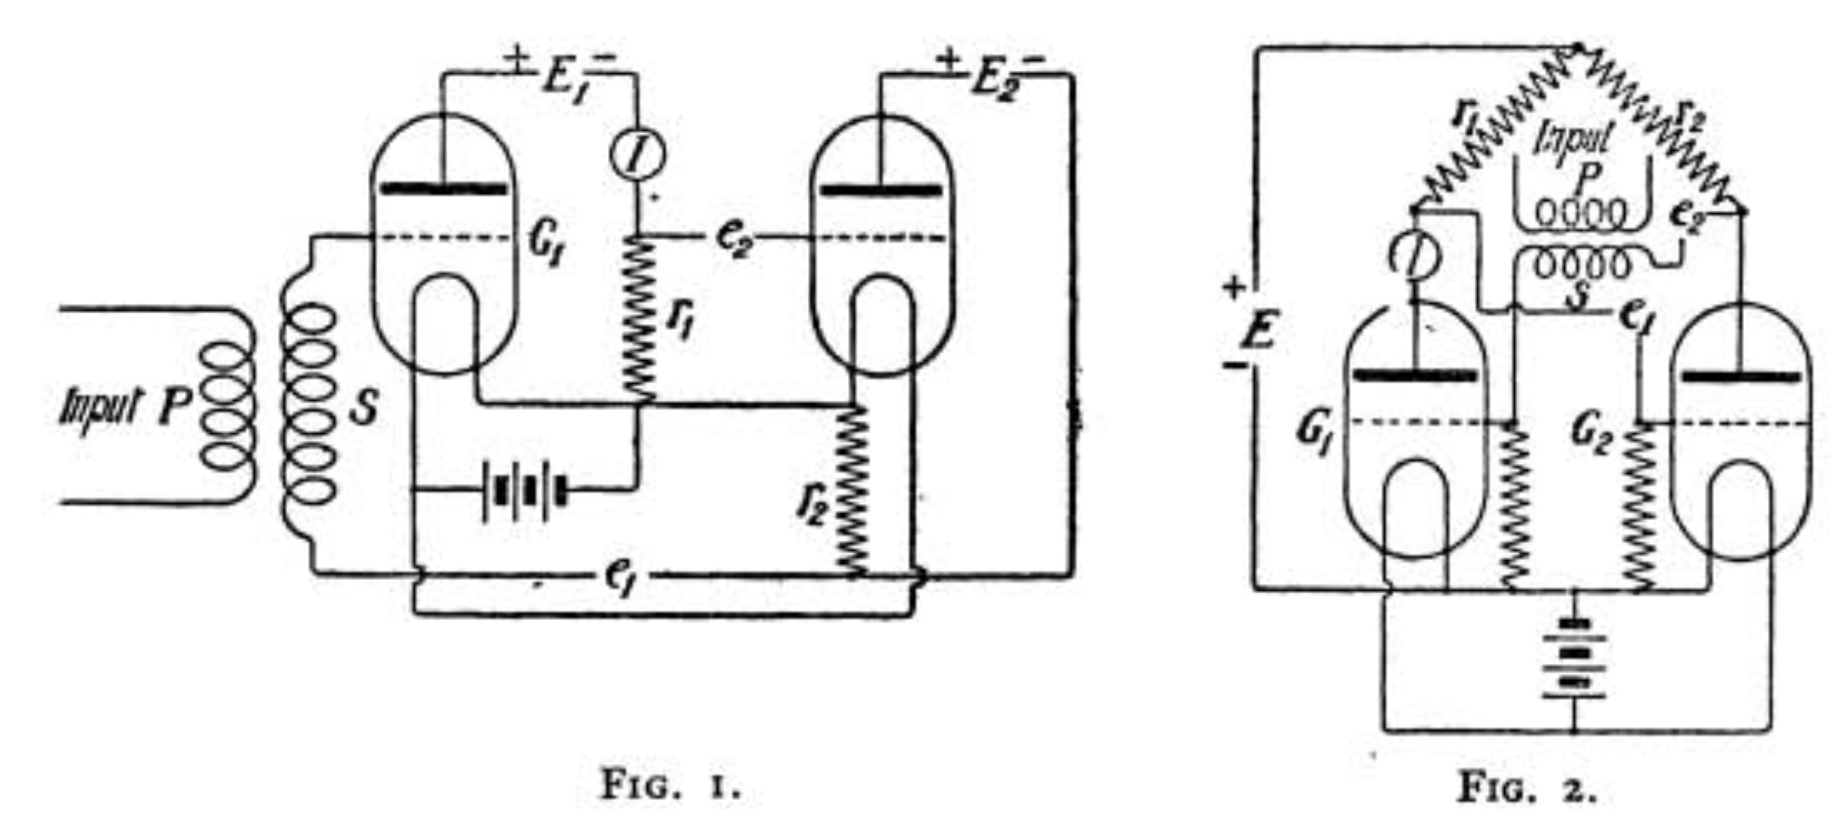
IEEE Spectrum published an article earlier this week that describes how the original flip-flop circuit was designed and built. According to the article, Re-creating the First Flip-Flop, the circuit was first invented in 1918 and used as a trigger relay for radio designs. An article in the December 1919 issue of The Radio Review popularized the circuit, which used two vacuum tubes!


Filed Under: Circuit Design

My first “fritzing”

August 15, 2017 By Dan KB6NU 1 Comment

So, I’ve started on my next book project, Ham Radio for Hackers. It’s going to be a collection of projects based on the Arduino and Raspberry Pi, with a bunch of other “makerish” stuff thrown in.

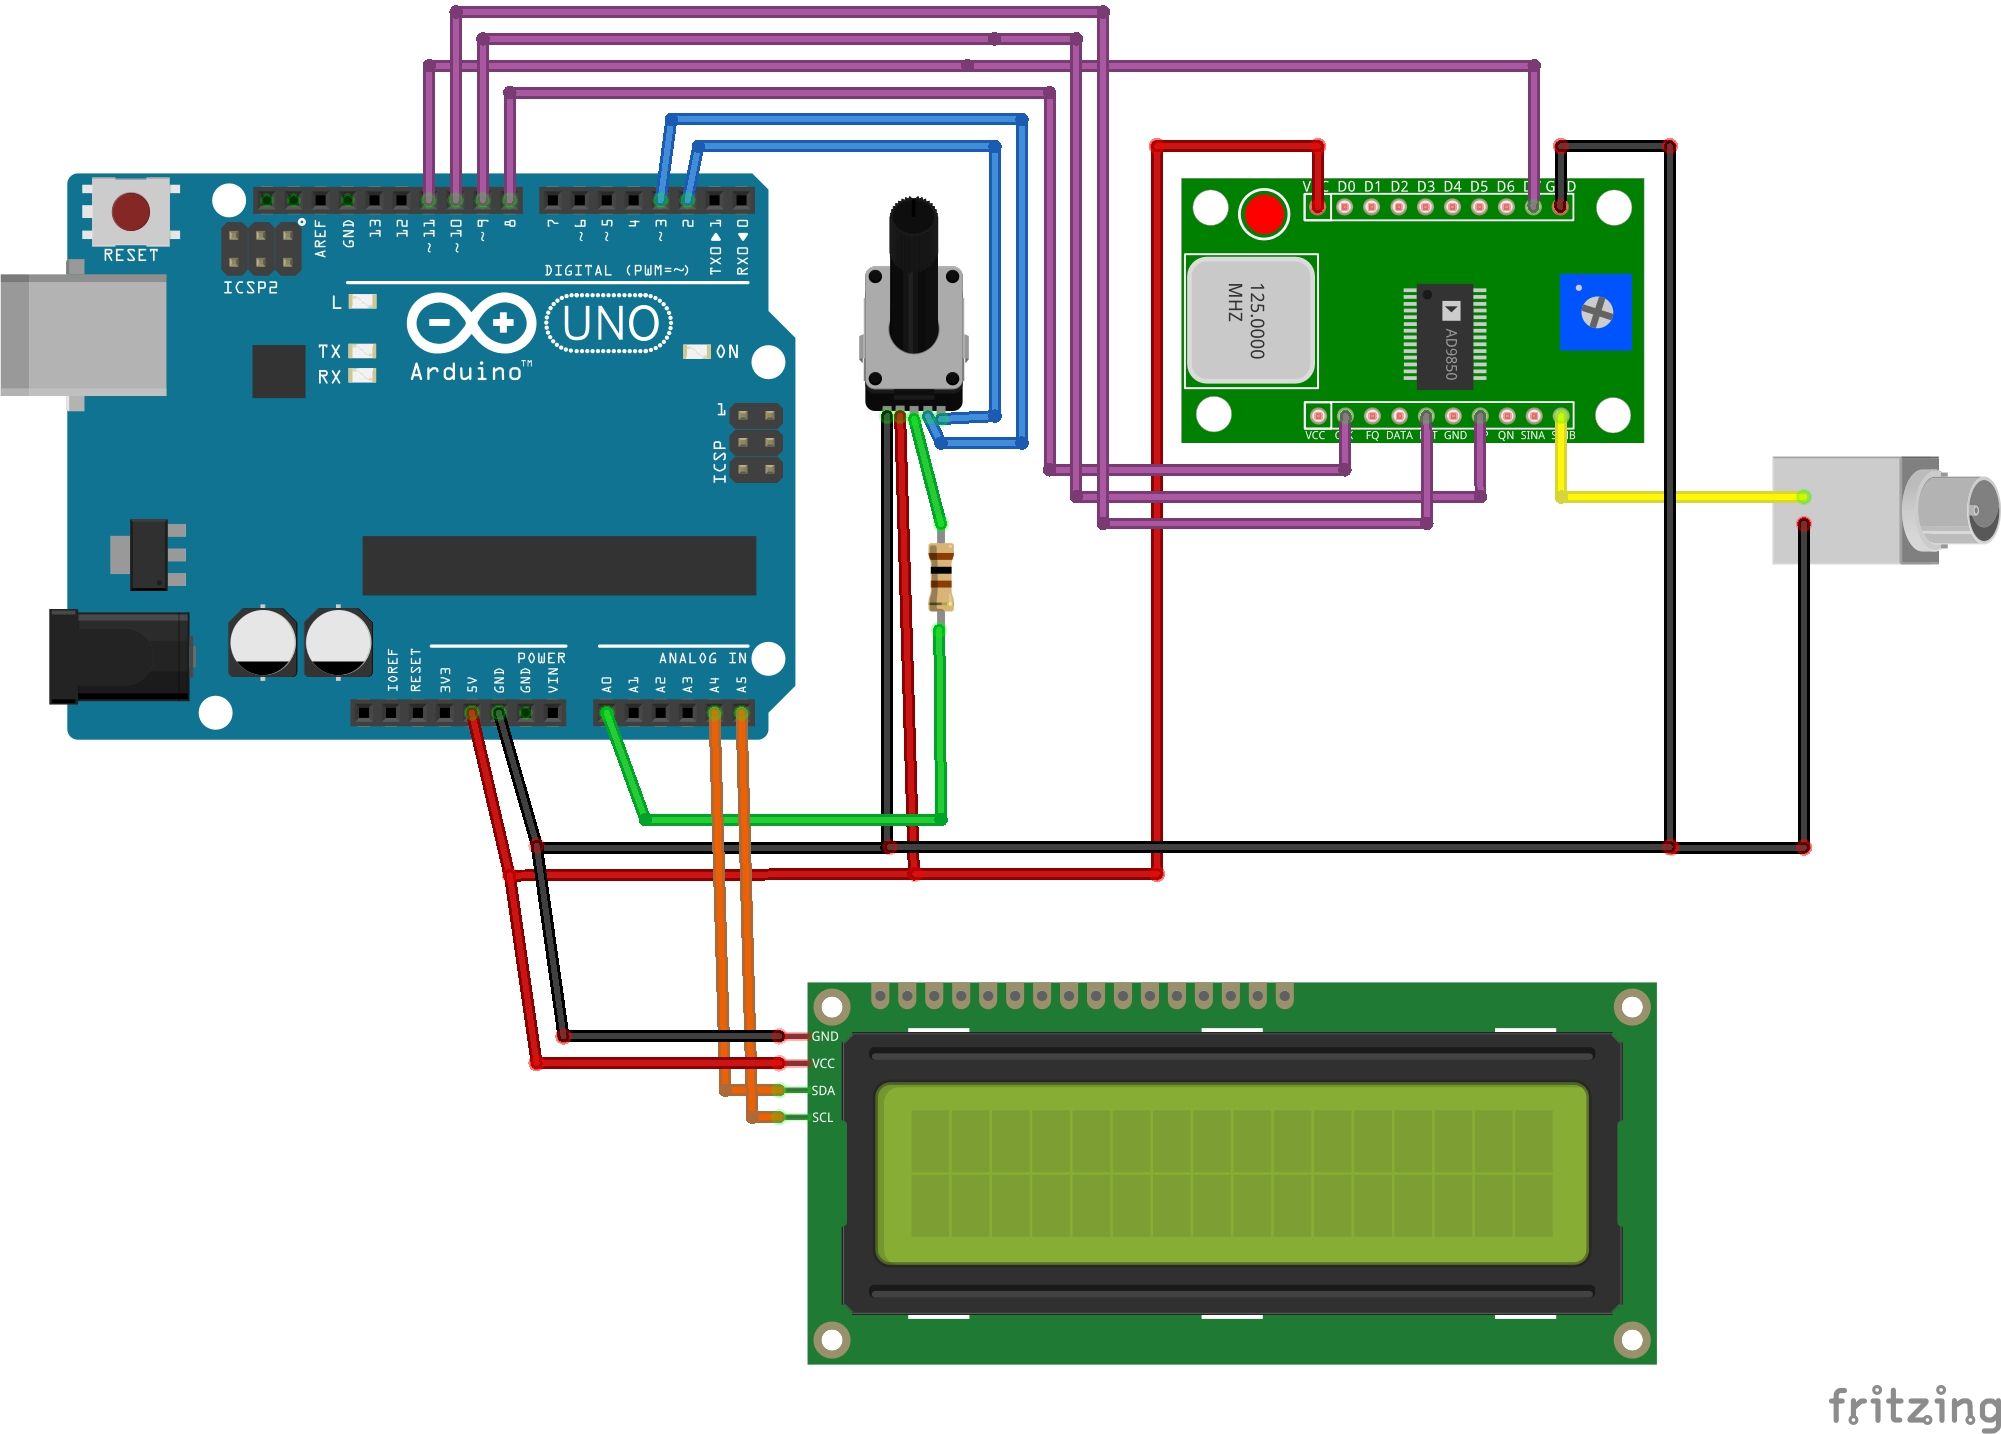
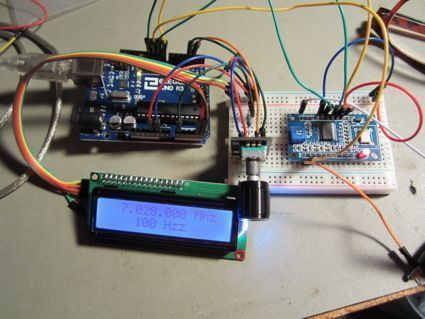
One of the first projects, if not the first, is going to be an Arduino/AD9850 DDS VFO. I’m using AD7C’s version as the starting point for mine.

One of the issues one always has with writing a book is generating illustrations, such as schematics and assembly drawings. One of the great tools out there that helps immensely with this is Fritzing. I’ve written about Fritzing before, but never had the opportunity to really use it.

Now, I do. Below, see my first real Fritzing drawing. You can click on the image to get a larger, easier-to-read version of the diagram.

And here’s the breadboard:

Filed Under: Books and Magazines, Building/Homebrew, Circuit Design

Not enough bounce

July 11, 2016 By Dan KB6NU 4 Comments

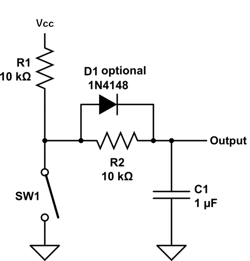
debounceLast year, I wrote about a problem that a friend of mine was having with a bouncing switch input. I searched the web, found the circuit at right, and proceeded to breadboard it for him. We put the scope on it, and it seemed to work great. A couple of weeks later, however, he called and said that when he tried using it in his math camp class, it didn’t work at all.

A couple of days ago, I got an e-mail from my friend, saying that it was time for math camp and could we take a look at the debounce circuit again. This time, we connected the circuit to the input of a 74LS640 transceiver, as he did last year. Sure enough, it just didn’t seem to switch at all. When I put the scope on it, I found that with the switch closed, the voltage on the output only got down to around 3 V or so.

I’m kind of confused by this. Is the IC input actually sourcing enough current to keep the output at 3 V?

What we ended up doing is wiring up a transistor switch on the debounce circuit output. That works just fine, but seems kind of kludgey to me.

Filed Under: Circuit Design Tagged With: debounce

From my Twitter feed: EveryCircuit, WebSDRs, small transistors

May 6, 2016 By Dan KB6NU Leave a Comment

tlrosstech's avatar T L Ross Tech @tlrosstech
EveryCircuit fb.me/8is0QTbev

StrangeBeacons's avatar Strange Beacons @StrangeBeacons
Links to a Large Collection of Online WebSDR Radios: websdr.org #SoftwareDefinedRadio #shortwave pic.twitter.com/7kR95VWbKb


alinaselyukh's avatar Alina Selyukh @alinaselyukh
“At some point in the near future, we’ll be building transistors out of just a handful of atoms… The gig is up.” twitter.com/npralltech/sta…
All Tech Considered @npralltech
After Moore’s Law: Predicting The Future Beyond Silicon Chips n.pr/1rXxJg9

Filed Under: Circuit Design, Circuit Simulation, Electronic Components, Electronics Theory, Online Resources, Software-Defined Radio (SDR) Tagged With: transistors, WebSDR

From my Twitter feed: LM386 analysis, circuit tools, portable solar power

July 14, 2015 By Dan KB6NU Leave a Comment

LA3ZA's avatarSverre Holm, LA3ZA @LA3ZA
Interesting analysis of the #LM386 internal circuitry electrosmash.com/lm386-analysis pic.twitter.com/3dhaIc3kuS


oshpark's avatar

OSH Park >@oshpark
Useful Tools for Drawing Electrical Circuits ow.ly/Pssmv


FoTimePodcast's avatarK4CDN @FoTimePodcast
#portable # solar for #hamradio buff.ly/1Ms5x9e

Filed Under: Building/Homebrew, Circuit Design, Gear/Gadgets, Solar Power

From my Twitter feed: conductive ink, kid’s radio, RPI meets SDR, CW apps

February 10, 2015 By Dan KB6NU Leave a Comment

DIYEngineering's avatarDIY Engineering @DIYEngineering
New Project: Amateur Chemistry: DIY Conductive Ink – Thanks to recent scientific advances, you can buy conductive … ow.ly/2UslZd

PA3U's avatar Frank Klaasen @PA3U
School project : Low-Cost Kids-Radio PE0RIG youtube.com/watch?v=zC4ljo… (kristalradio.nl/article/opmerk… …) #hamradio #hamr

VE4BBWARC's avatarWpg Amateur Radio @VE4BBWARC
new #raspberryPI meets #sdr! more #hamr fun klou.tt/1w0xo6k98h05h pic.twitter.com/xDviOgoGJg

Steve Netting @Steve_M0SPN
Learning CW? My 3 favourite Android Morse Apps: m0spn.co.uk/?p=119 Current addiction: Morse Machine! #hamradio #amateurradio

Filed Under: Building/Homebrew, Circuit Design, Computers, CW, Kits, Software-Defined Radio

From my Twitter feed: PCB printers, Prof. Yagi, Chinese QRP rig

January 10, 2015 By Dan KB6NU 1 Comment

hackaday's avatar
hackaday @hackaday
Circuit printers: Voltera and Voxel8 wp.me/pk3lN-BgR

prof-yagiIK6REB's avatar

IK6REB – W2DZZ @IK6REB
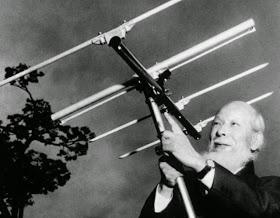
Many thanks Prof. Yagi. #hamradio #hamr #antenna #science


The cost for the little beauty below is only $11, assembled….Dan

G0MQW's avatar
Chris GØMQW @G0MQW
Check out Assembled HAM RADIO 40M CW QRP TRANSCEIVER transmit 7.023-7.026 MHz DC 12V 9V ebay.com/itm/4007786475… + free China Radio Reception

Filed Under: Antennas, Building/Homebrew, Circuit Design, Gear/Gadgets, PCB design, People

Mouser, NI offer free design/simulation/layout tool

January 8, 2015 By Dan KB6NU 2 Comments

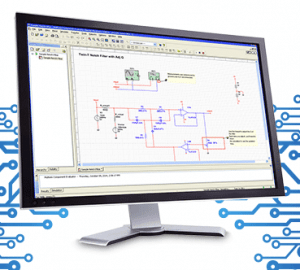
multisim-blueNational Instruments and Mouser have teamed up to offer an integrated design tool called MultiSIM Blue. Here’s what the Web page has to say:

With MultiSIM BLUE, the entire tool chain is fully integrated. Easily scheme, simulate, PCB layout, BOM and purchase all in one integrated tool. Discover an easy-to-use, seamless environment for the functional simulation of linear circuits using the Berkeley SPICE engine and over 100,000 components from the industry’s leading manufacturers – built-in from the start. Plus, parts will be frequently added to your Mouser parts database with the newest authorized components from Mouser.

System Requirements for MultiSIM BLUE

  • Windows Operating System
  • Pentium 4/M class microprocessor or equivalent
  • 512 MB of memory (256 MB minimum)
  • 2 GB of free hard disk space
  • Open GL capable 3D graphics card recommended (SVGA resolution video adapter with 800 × 600 video resolution minimum, 1024 × 768 or higher preferred)

Supported Operating System Requirements

  • Windows XP (32-bit)
  • Windows Vista (32-bit & 64-bit)
  • Windows 7 (32-bit & 64-bit)
  • Windows Server 2003 R2 (32-bit)
  • Windows Server 2008 R2 (64-bit)
  • Windows 8 (32-bit & 64-bit)
  • Windows 8.1 (32-bit & 64-bit)

I haven’t tried it yet, but it looks like an interesting piece of software, and you can’t beat the price–it’s free! I’m a little surprised that it only runs on Windows as NI really got started in the software biz with LabView for the Mac. That shouldn’t be a big deal for hams, though, as most of us have Windows machines in our shacks.

Filed Under: Circuit Design, Circuit Simulation

  • Page 1
  • Page 2
  • Page 3
  • Go to Next Page »

Primary Sidebar

No Nonsense Technician Class License Study Guide (for tests given between July 2026 and June 2030)

New No Nonsense Technican Class Study Guide now available!

The 2026 version of my Tech Class study guide is now available, and as always, the PDF version is FREE!. The ePub version costs $11.97, and a Kindle version and paperback version will be available on Amazon shortly.

Click here to get all of my "No Nonsense" study guides.

Also available: The CW Geek's Guide to Having Fun with Morse Code

W5SWL.Com
Retevis Ailunce H1 DMR Radio
DXpander: Cobweb antennas, Laser Cutting

You’ve got mail!

Enter your email address below and get an email every time I publish a new post.

Email


I frequently teach classes to help newcomers get their licenses. The next class will take place on Saturday, October 10, 2026 on the University of Michigan campus. Click here for more information.

If you can't make the class, subscribe to the mailing list to be notified of when the next class will be held.

You can always download my free study guide, and if you have any questions about the classes, or amateur radio in general, please feel free to email me directly.

Support KB6NU.Com

Donate $7.30 and get two of these cool stickers. Measuring 4.25-in. W by 2.75-in. H, it's perfect for your car, your shack, or wherever!

Contact me

If you have a question or comment about one of my blog posts, or a question about any of the material in my study guides, or just a question about ham radio in general, you can email me at [email protected].

Blogs You Should Also Read

  • AE5X: A CW-centric blog from Kingswood, Texas
  • K0LWC Blog
  • LA3ZA Ham Radio Blog
  • Little Radios, Big Fun – WB3GCK
  • Mr. Vacuum Tube's Blog
  • Radio Artisan – K3NG
  • The K0NR Weblog
  • VE3WDM's QRP Ham Radio Blog
  • W2LJ’s Blog

Ham Radio Websites

  • Dashtoons – The Hammin' Comedy by Jeff K1NSS

Podcasts

  • ICQ Podcast
  • Linux in the Ham Schack
  • No Nonsense Amateur Radio Podcast
  • Resonant Frequency Amateur Radio Podcast

Recent Comments

  • Bulin 47 AI on ICQPodcast Episode 485 – World Cup Special Event Station
  • Jesse Alexander on What do you think of this artwork for the ham radio EMF Explorer
  • CADProps on My first go at 3D printing not quite a success
  • Dan KB6NU on A Media Guide to Amateur Radio
  • Steve Stroh N8GNJ on A Media Guide to Amateur Radio

Meta

  • Log in
  • Entries feed
  • Comments feed
  • WordPress.org

Footer

Copyright © 2026 Daniel M. Romanchik, KB6NU · Log in